When your oven suddenly stops heating properly, it’s often the heating element at fault. The good news? You don’t have to be a professional technician to swap out a faulty element. With a bit of patience and the right approach, most homeowners can handle this repair on their own—saving both time and money. Here’s an in-depth guide that’ll walk you through each step.
What Is an Oven Heating Element?
The heating element is essentially the heart of your electric oven—it’s the coil (either at the top or bottom) that glows red when the oven is in use. If you notice your oven isn’t getting hot enough or is heating unevenly, there’s a good chance this part needs replacing.
Signs Your Oven Heating Element Is Broken
It’s not always obvious when the element is the problem. Look out for these common symptoms:
- The oven doesn’t heat up at all, even when set to high temperatures.
- The element shows visible signs of damage, such as blisters, cracks, or spots that look burned.
- Food is cooking unevenly—one side might be cold, the other too hot.
- The element doesn’t glow red during operation.
Safety First: Precautions Before You Start
Before you grab your toolkit, let’s talk safety:
- Unplug the oven or switch off the circuit breaker. Never attempt any repairs while the appliance is connected to electricity.
- Allow the oven to cool down. Heating elements retain heat, so always wait until everything feels completely cool.
- Wear gloves to protect your hands from sharp edges or residue.
Tools and Materials You’ll Need
Chances are, you already have most of these at home:
- Phillips or flathead screwdriver (depending on your oven)
- Replacement oven heating element (ensure it matches your oven’s make and model)
- Work gloves
- Flashlight (optional, but handy for dark corners)
- Multimeter (optional, for testing the old element)
Step-by-Step: How to Replace the Heating Element
Step 1: Access the Heating Element

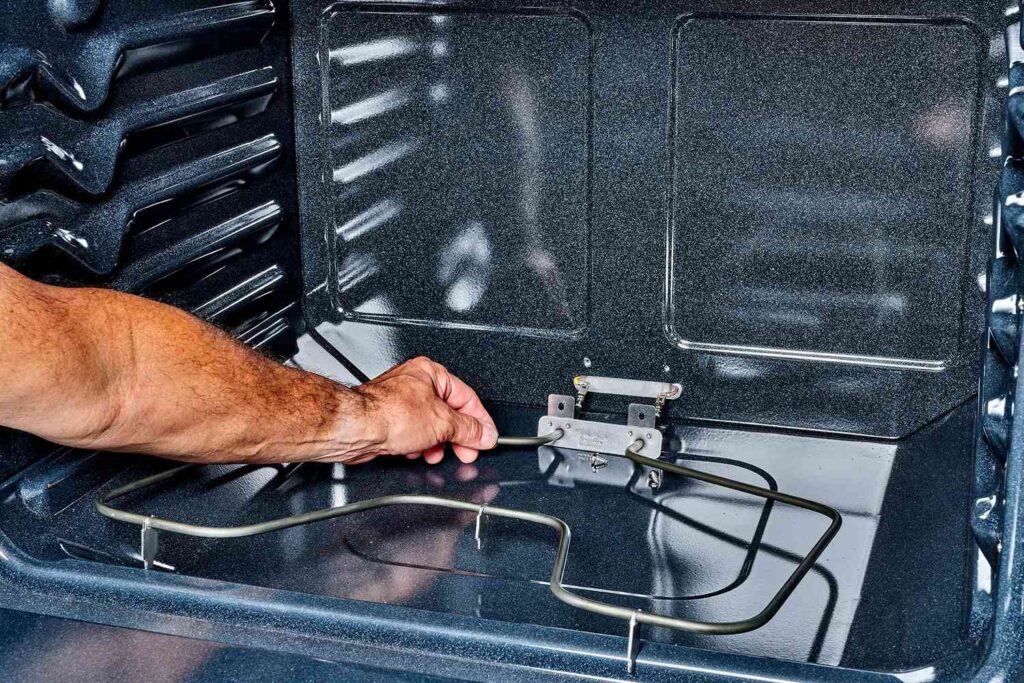
Most ovens have their main heating element at the bottom. Open the oven door and remove any racks that are in your way. The element is usually attached to the oven’s back wall with screws.
Step 2: Remove the Broken Element

- Use your screwdriver to carefully loosen the screws holding the element in place.
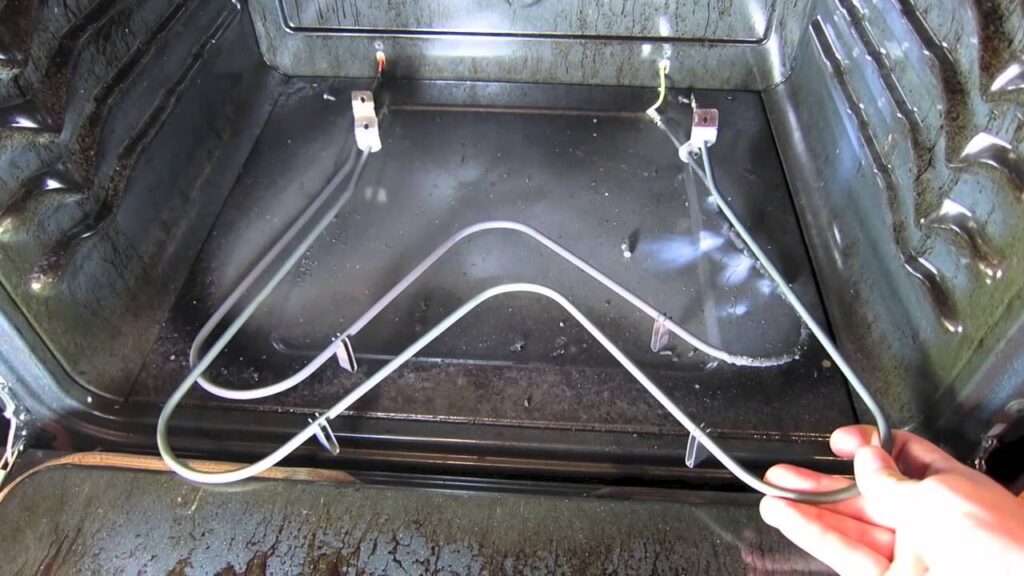
- Gently pull the element toward you. You’ll see wires connected at the back.
- Take a photo before disconnecting the wires—this makes reassembly much easier.
- Disconnect the wires by sliding them off the terminals. If they’re stuck, gently wiggle them free.
Step 3: Install the New Element
- Connect the wires to the terminals on your new heating element, making sure they’re secure.
- Align the new element with the screw holes and fasten it to the oven’s back wall.
- Double-check that everything is snug and properly attached.
Step 4: Test Your Work
- Restore power to the oven by plugging it back in or switching on the breaker.
- Set the oven to bake at a moderate temperature and watch for the new element to glow.
- If all goes well, you’re done! If not, double-check your connections or consult your oven’s manual.
Troubleshooting: What If It Still Doesn’t Work?
If your oven is still not heating up after you’ve installed the new element:
- Ensure the oven is receiving power.
- Double-check the wiring connections.
- Consider testing the thermostat or control board, as these parts can also cause heating problems.
If you’re still stumped, don’t hesitate to contact a qualified appliance repair technician.
Pro Tips for a Smooth DIY Repair
- Always order the correct part for your specific oven model. Model numbers can usually be found inside the oven door or on the back panel.
- Take your time—rushing can lead to mistakes or injury.
- Keep all screws and parts organized so nothing goes missing during the process.
When Should You Call a Professional?
While this repair is straightforward for many people, there are situations where it’s best to call in an expert:
- If you encounter damaged wiring or signs of burning/melting inside the oven.
- If the new element doesn’t solve the problem.
- If you’re not comfortable working with electrical appliances.
Final Thoughts
Replacing an oven heating element isn’t as intimidating as it sounds. With the right tools, a bit of patience, and this guide by your side, you’ll have your oven back in working order in no time. And who knows? Maybe you’ll even enjoy the process—it’s a satisfying, practical win for any DIY enthusiast.
